Adafruit UNTZtrument
Aug 18, 2014 · 2 mins read
After adventuring into the world of the Raspberry Pi, I decided it was long overdue to get into Arduino. I did some research and I found that the Arduino boards and platform was in fact created at the Interaction Design Institute Ivrea in Ivrea, Italy in 2005 as a project of Interaction Design. And the name “Arduino” comes from a bar in Ivrea, where some of the founders of the project used to meet.
The Arduino was created as a project of Interaction Design!
This was great news for me because since I’m a designer it should be pretty easy for me to get my hands on a board and start creating things. Also, the programming language of the Arduino (Wiring) is a mix between Processing and C++ and since I had already learned Processing it was really easy to start programming.
For me the best way to start discovering an unknown field is to find some tutorials and projects and start building! So I found this great project by Adafruit in which you are explained how to create an open-source hackable Midi instrument. This was great because not only can it play midi notes but can also be programed as a general interface for my design projects!
It can also be programed as a general interface for my design projects!
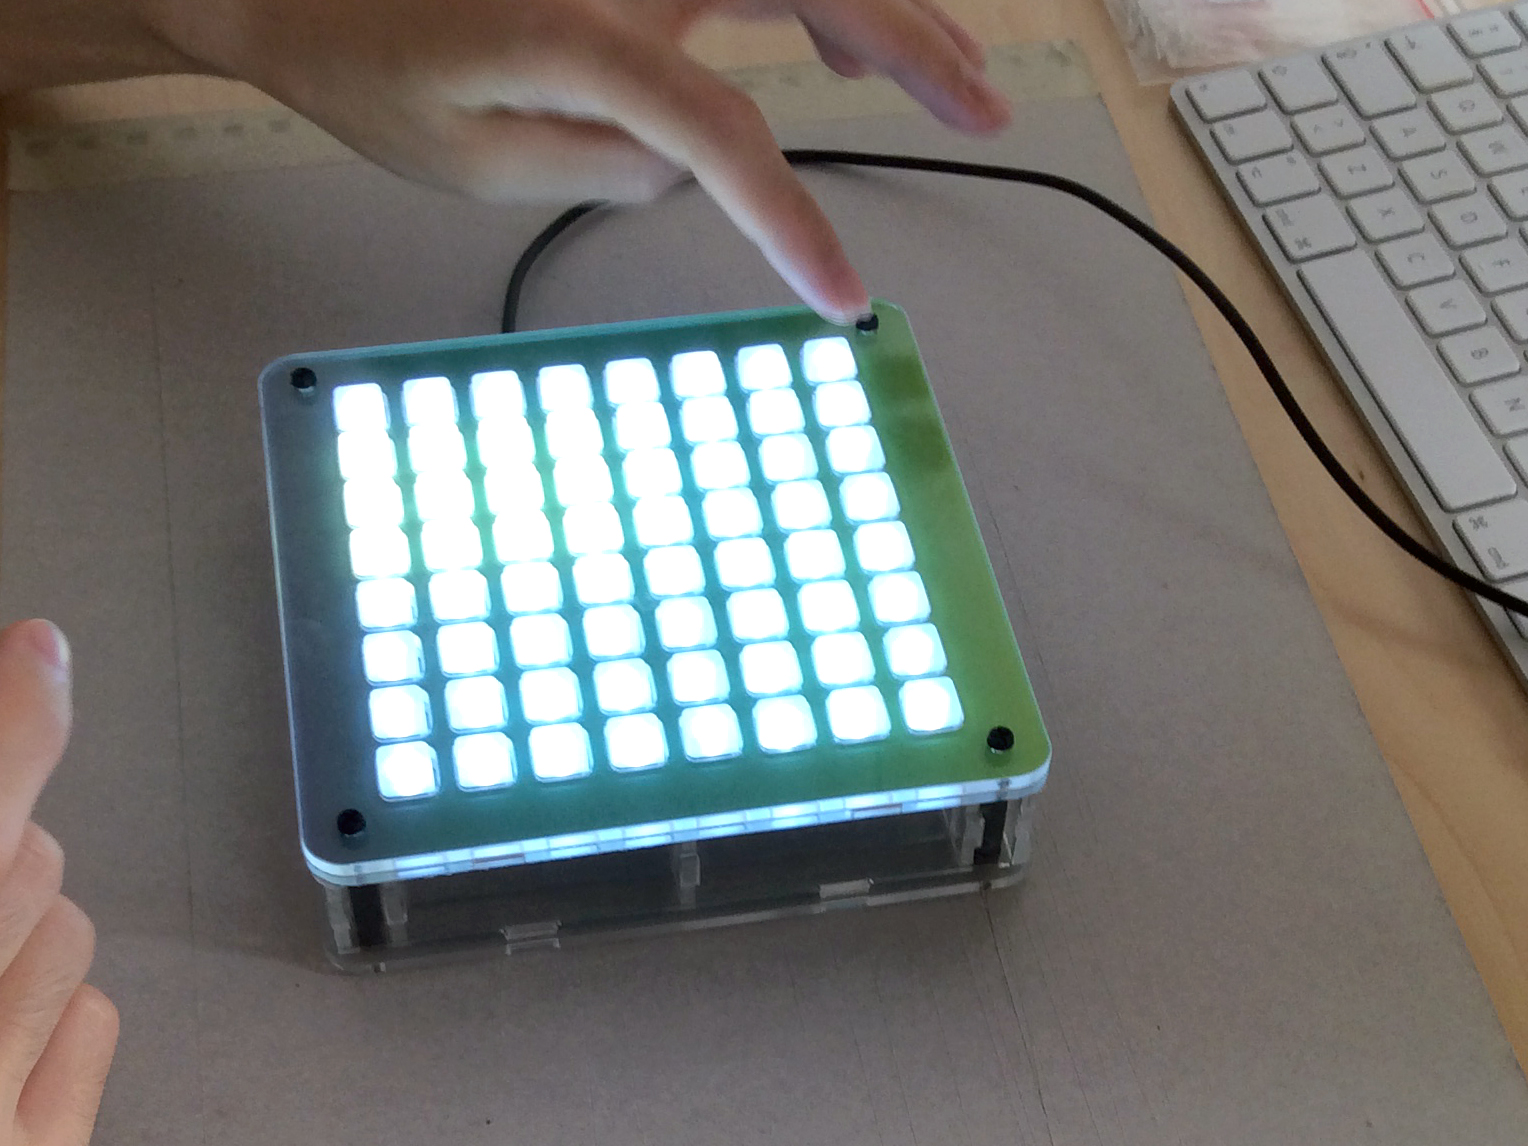
First step was to order all the parts, finding distributors in Europe (because shipping cost from EUA were prohibitive…), other on ebay, and waiting for them all to arrive. When I had all the items I just had to follow the awesome created by Adafruit for the Adafruit UNTZtrument (it was called Oontz at the time…).
Then, I just had to solder 64 LED’s, 25 connections, laser cut and assemble the acrylic case and make the connections with the Arduino; doesn’t sound like much right?
Tadaaaaa! It’s done, fully functional.
That’s it for now, on part 2 I’ll talk about the Arduino programming and code for the UNTZtrument.